Replicating a phosphate finish.

Scotthw

Active member
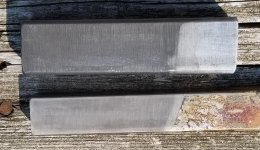
Just thought I should share some of my findings on replicating phosphate finishes. With this particular project I needed to replace a completely removed rear sight. I located a blued sight of the correct manufacture and experimented with the brownells zinc phosphate solution on a few metal parts to see the chemicals reaction on differently prepared steel surfaces. I was able to acheive a finish that nearly matches my origional finish on my rifle by highly polishing the steel parts prior to phosphating. The temperature I used never exceeded 180 degreese and I used slightly less solution than was listed in the instructions. After the process I quckly buffed the phosphated parts with a fine stainless carding wheel that I use for bluing at a low RPM and added oil. I hope this information helps to anyone stuck in the same situation that I was.

1.jpg
2.JPG
3.jpg
4.jpg
5.jpg
6.jpg
 
Great information to pass along! Thanks! How does Brownell's have it listed? Any part or item #?
 
Great information to pass along! Thanks! How does Brownell's have it listed? Any part or item #?

This is the stuff right here.
brownells.jpg

They have the ratio listed 124OZ of tap water to 4OZ of zinc solution. I found that if it's thinned a bit more it more closely matches what the Germans were doing.
 
I rebuilt a byf45 for a guy once, that had mostly zinc phosphated parts. It was missing the triggerguard, and I just so happened to have a correct stamped triggerguard that had been RC'd.

Instead of a hot phosphate, I simply dissolved zinc pellets in phosphoric acid (readily available at plumbing, hardware and auto supply stores here). Let it sit over night, then I simply immersed the triggerguard and floorplate into the solution - cold - and let it sit for about 20 minutes. Prts came out BLACK like US parkerising, but this is only a pseudo-effect - a quick rinse in boiling water removed the black and showed a nice "silvery grey" phosphate that was indistinguishable from the originals, and no need to card it either as the etch was not deep at all. Oiled it and that was that.

I often wonder if the Germans didn't hot phosphate either, but just dunk, rinse and oil - especially the bcd's and bnz's
 
Thanks everyone for the support. I think that's awesome that there is more than one way to do it. I suppose we will never know exactly what they did; however doing it hot takes less time I would imagine. The parts spent maybe 1-1.5 minutes in the solution tops. Carding was only done to force age to the rest of the original parts. Do you have any pictures? How was your metal prep? Sanded or polished? I think this is all great data that is rarely discussed.
 
Thanks everyone for the support. I think that's awesome that there is more than one way to do it. I suppose we will never know exactly what they did; however doing it hot takes less time I would imagine. The parts spent maybe 1-1.5 minutes in the solution tops. Carding was only done to force age to the rest of the original parts. Do you have any pictures? How was your metal prep? Sanded or polished? I think this is all great data that is rarely discussed.

Had pictures - a hard drive that died instantaneously about 2 years ago saw the demise of those :( 
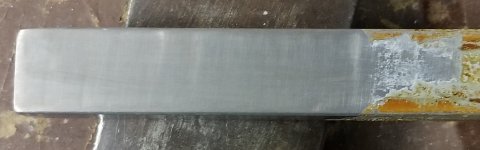
(along with a treasure trove of photos). No surface prep except a degrease.
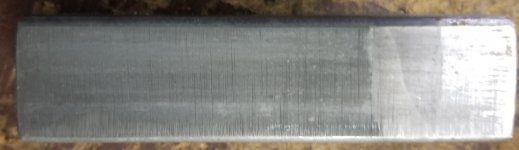
I have a phosphated rear sight collar here too - really late one, not an Israeli retread. If you ever need one again...
 
I bought the pint and I imagine it will last for years. The ratio of mixing for the acid is so small, I've done two different tank fulls so far and only used 4oz.
 
actually, you can phosphate parts with common tile cleaning fluids found in home depot, you can also change colors say you want a greener color just throw in apiece of copper ot a blacker color some manganese

these formulas have been around since the event of the internet began, this info is commonly found on gun builder sites
 
Other replica phosphate options

I did a little experiment this weekend with a couple of products I had on hand from Eastwood that I have used for removing rust from car parts. Eastwood Fast Etch was used on the larger square tube and Eastwood Oxi Solv (don't think that is available anymore)was used on the smaller one. The larger one was cleaned and had the scale sanded off leaving some rough marks and the smaller one was cleaned and sanded smooth. They were left in each solution for about 1.5 hours and then cleaned off and neutralized with water and acetone. Then I heated each with a heat gun and soaked in clean 5w-20 oil. Did that twice. I think the color turned out ok overall. I'm doing an exposure check on them and leaving them in the elements for a couple weeks to see how they hold up. I might do some MP44 parts this way if it holds up. Any thoughts on which looks better?
Kevin
 

Attachments

  • 20180813_112155.jpg
    20180813_112155.jpg
    216.6 KB · Views: 51
  • 20180812_223900.jpg
    20180812_223900.jpg
    205 KB · Views: 46
  • 20180812_180621.jpg
    20180812_180621.jpg
    192.5 KB · Views: 43
..Any thoughts on which looks better?

I'd think they'd both have their place depending on what finish you're trying to replicate. I like how they both came out but I'd really like to see how well they hold up.
 
Me too, they're outside now. Nothing other than the finish and the dunk in motor oil. That will evaporate pretty quick in the sun and heat. I am guessing after a week they will have some rust on there. If I finish a rifle that way and use quality gun oil and keep it indoors I suspect the finish will last as good as thin bluing would. This weekend I might treat a couple more pieces for a longer period of time and see how they do. Maybe I will add in a third piece that has been blasted rough.
 
Back
Top